From soap kitchen to shower — how we make our goat milk soap
By
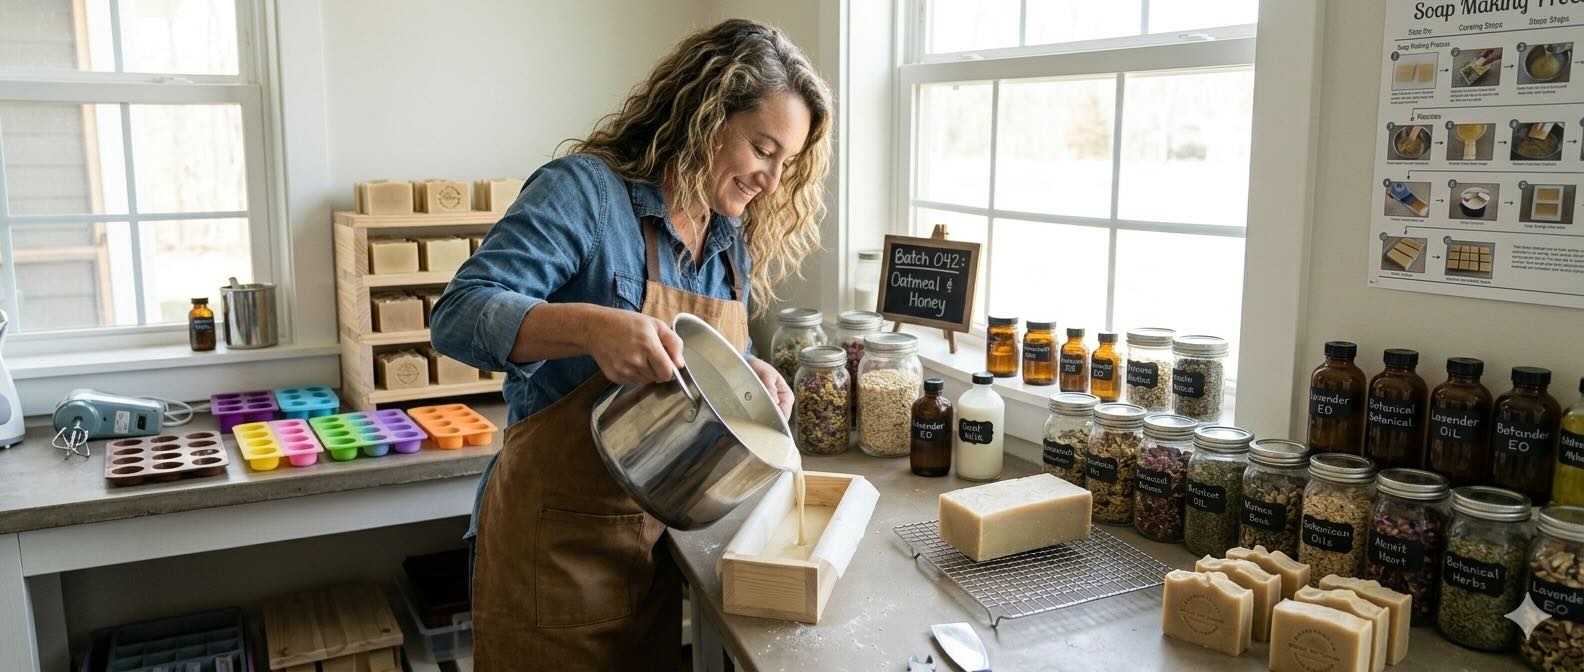
Our soap kitchen is the smallest, busiest room on the farm.
On a good week we’ll make 80 to 100 bars, each one starting with milk we hand-collected that morning from our Nigerian dwarf girls. The whole process — from first milking to a bar that’s ready for your shower — takes about four to six weeks.
Here’s how it happens.
Step one: the milk
Everything starts in the barn, early morning, twice a day.
Our does are milked by hand into stainless steel pails, then immediately strained, chilled, and stored. The milk we use for soap is the same milk we use for drinking and selling — there’s no “reject” pile. If it’s not good enough to drink, it doesn’t go in our soap.
For soapmaking, we typically freeze the milk before use. This sounds counterintuitive, but frozen milk (or milk-slushy, technically) helps control the temperature reaction when you add lye, which we’ll get to in a moment.
Step two: the lye
Cold-process soap requires sodium hydroxide — lye. This is where a lot of people get nervous, and it’s fair: lye is caustic and has to be handled carefully. Gloves, eye protection, ventilation. We take it seriously.
The lye gets combined with the frozen milk slowly, in small additions. The reaction generates heat; adding to frozen milk keeps temperatures in a range that doesn’t scorch the milk sugars (which would turn the soap an unappetizing orange-brown color and give it a burnt smell).
Once the lye and milk are fully combined, you have what soapmakers call the “lye solution” — but at this point, nothing is soap yet.
Step three: the oils
Good soap needs a balance of oils. Ours uses:
- Olive oil — conditioning, gentle, slow to lather
- Coconut oil — big, bubbly lather, hardening
- Palm oil — hardness and longevity (we use sustainably sourced)
The oils are warmed gently, then combined with the lye solution. With an immersion blender, you mix until the batch reaches “trace” — a point where the mixture has thickened slightly, like a thin pudding. At this point, you add your fragrance or essential oils, and any extras (oats, honey, herbs).
Step four: the pour and cure
Once everything is combined, the batter goes into molds. Ours are wooden, lined with freezer paper, sized to cut into roughly 4-ounce bars.
We cover the molds and wrap them in towels. This isn’t just tidiness — the saponification process (the chemical reaction that turns fat and lye into soap) generates heat, and keeping it insulated helps the reaction complete evenly.
After 24–48 hours, the bars are firm enough to unmold and cut.
Then comes the waiting.
Fresh-cut soap has to cure for four to six weeks on open wooden racks. During this time, the last traces of lye finish reacting with the oils, and the bar hardens and mildifies. Rushing this step makes soap that’s harsh and drying. Giving it time makes soap that’s creamy, gentle, and long-lasting.
Step five: the bar you take home
After the cure, each bar is inspected, trimmed if needed, labeled, and packaged. The whole batch usually gets evaluated bar by bar — we’re looking for clean cut lines, consistent color, no pockets or separation.
What ends up in our shop is the product of that whole chain: morning milk, careful chemistry, patient cure. It sounds like a lot, but honestly, once you’re used to it, there’s something deeply satisfying about the rhythm of it.
And when a customer tells us it’s the first soap that’s worked for their sensitive skin — yeah, that makes it worth it.
[Continue — add photos of the process, details about different batches and what makes each variety unique, tips for storing and using the soap, etc.]